Introduction
Most of us throw away electronic devices the moment something goes wrong. A phone stops charging. A laptop overheats. A remote control suddenly dies. We assume the repair will be expensive or complicated, so replacement feels easier.
In reality, many common electronics problems are simple to fix at home with basic tools and a little patience. Learning DIY electronics repair can help you:
- Save a lot of money
- Extend the life of your devices
- Reduce electronic waste
- Understand how everyday gadgets work
This guide is written for beginners to intermediate users. You do not need an engineering background. We will explain things clearly, step by step, using real-life examples and safe practices.
By the end, you will know what you can safely repair at home, what tools you need, and when it is better to stop and seek professional help.
What Counts as “Common Electronics”?
Before repairing anything, it helps to understand what we mean by common electronics.
These are everyday devices found in most homes:
- Smartphones and feature phones
- Laptops and desktop computers
- Chargers, cables, and power adapters
- Remote controls
- Headphones and earphones
- Speakers and Bluetooth devices
- Wi-Fi routers and modems
- Small kitchen electronics (mixers, electric kettles, induction plates)
These devices often fail due to minor issues, not major internal damage.
Is It Safe to Repair Electronics at Home?
Yes — if you follow basic safety rules and limits.
DIY repair is safe when:
- The device runs on low voltage
- The issue is external or modular
- You use proper tools
- You disconnect power before opening
DIY repair is not safe when:
- The device is directly connected to mains electricity
- High-voltage capacitors are involved
- Batteries are swollen or leaking
- The device is under warranty (you may void it)
Rule of thumb:
If the fix involves cleaning, replacing a cable, battery, connector, or external component, DIY is usually safe.
Following basic electronics safety guidelines is essential before attempting any DIY repair to avoid electrical shock or device damage.
Tools You Need for DIY Electronics Repair
You do not need an expensive toolkit. A small set of basic tools covers most home repairs.
Essential Tools
- Precision screwdriver set
- Plastic pry tools or old credit cards
- Tweezers
- Soft brush or toothbrush
- Microfiber cloth
Helpful Extras
- Multimeter (for testing voltage and continuity)
- Isopropyl alcohol (90% or higher)
- Compressed air
- Replacement cables or batteries
These tools are reusable and often pay for themselves after one or two repairs.
If you wish to purchase a multimeter, here is an excellent buying guide for best digital multimeters for electronics and mobile repairing work.
Common Electronics Problems You Can Fix at Home
Let’s look at the most frequent issues people face — and how to fix them.
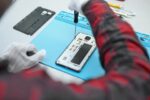
1. Phone or Device Not Charging
Common Causes
- Dirty charging port
- Damaged charging cable
- Faulty power adapter
- Loose internal connector
DIY Fix
- Switch off the phone or mobile device
- Use a wooden toothpick or plastic tool to gently clean lint from the charging port
- Blow compressed air to remove dust
- Try a different cable and adapter
Here is a list of tools needed for DIY cell phone repair if you wish to expand your scope of DIY phone repair.
Real-life example:
Many phones appear “dead” simply because pocket lint blocks the charging port. Cleaning often solves the problem in minutes.
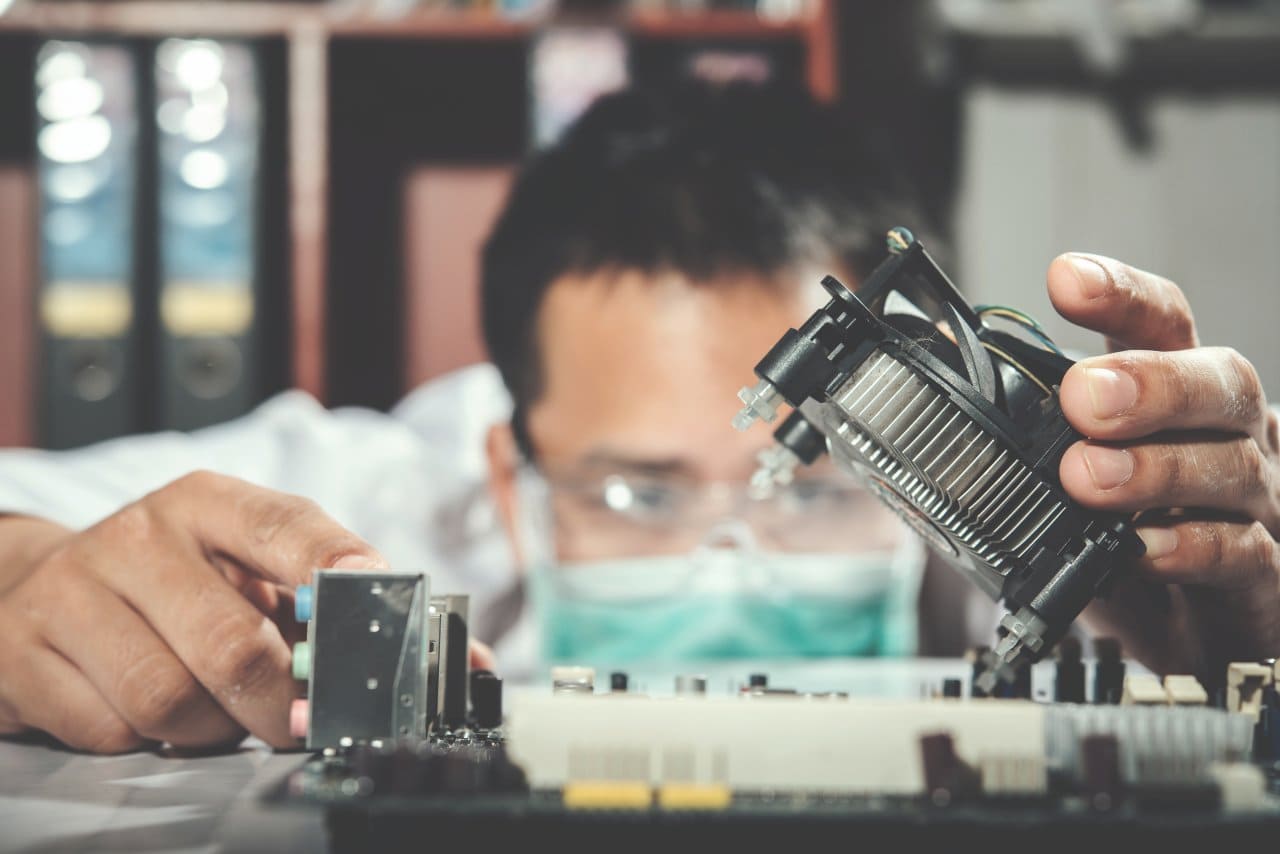
2. Laptop or Smartphone Overheating
Common Causes
- Dust buildup
- Blocked air vents
- Background apps overworking the system
DIY Fix
- Clean air vents with compressed air
- Place the device on a flat, hard surface
- Close unused apps
- Update software if overheating started after an update
Overheating reduces battery life and performance. Regular cleaning can prevent long-term damage.
3. Remote Control Not Working
Common Causes
- Dead batteries
- Dirty battery terminals
- Worn rubber buttons
DIY Fix
- Replace batteries first
- Clean battery contacts with alcohol
- Open the remote and clean button pads gently
This fix costs almost nothing and avoids unnecessary replacement.
4. Earphones or Headphones Only Working on One Side
Common Causes
- Broken wire near the jack
- Dust inside the connector
DIY Fix
- Clean the audio jack with a soft brush
- Bend the cable gently to identify loose connections
- Use heat-shrink tubing or electrical tape for minor wire damage
If the internal wire is fully broken, replacement may be better.
5. Charger or Cable Heating Up
Common Causes
- Internal wire damage
- Cheap or incompatible charger
DIY Fix
- Stop using the cable immediately
- Inspect for visible cuts or bends
- Replace with a certified cable
Overheating chargers are a fire risk. Replacement is safer than repair here.
6. Laptop Keyboard or Mouse Not Responding
Common Causes
- Dust or food crumbs
- Software driver issues
DIY Fix
- Disconnect power
- Shake gently upside down
- Clean with compressed air
- Reinstall drivers if needed
External keyboards and mice are usually easier to fix or replace.
Step-by-Step: Basic Electronics Cleaning (Safe for Beginners)
Regular cleaning prevents many issues.
What You Need
- Soft brush
- Isopropyl alcohol
- Microfiber cloth
Steps
- Power off and unplug the device
- Remove external components
- Brush away dust gently
- Clean contacts lightly with alcohol
- Let dry completely before powering on
Cleaning alone fixes a surprising number of problems.
Common Mistakes to Avoid
Many DIY repairs fail because of avoidable mistakes.
- Using metal tools inside ports
- Pulling connectors forcefully
- Ignoring battery swelling
- Mixing up screws
- Repairing devices while plugged in
Take photos while disassembling. This helps during reassembly.
When You Should NOT DIY Repair
DIY repair is not always the right choice.
Avoid home repair if:
- The device is still under warranty
- The battery is swollen or leaking
- The device smells burnt
- The repair involves soldering mains circuits
In such cases, professional repair is safer and sometimes cheaper in the long run.
Pros and Cons of DIY Electronics Repair
Pros
- Saves money
- Reduces electronic waste
- Builds practical skills
- Extends device lifespan
Cons
- Risk of further damage if done incorrectly
- Time investment
- Limited by tools and experience
DIY repair works best for simple, common issues.
The global right to repair movement explains why consumers should be able to fix common electronics at home instead of replacing them unnecessarily.
DIY Repair vs Professional Repair
| Point | DIY Repair | Professional Repair |
|---|---|---|
| Cost | Low or free | Medium to high |
| Time | 10–60 minutes | 1–5 days |
| Skill needed | Basic | None |
| Tools | Basic tools | Not needed |
| Risk | Low (simple fixes) | Very low |
| Warranty | May void | Usually safe |
| Best for | Minor issues | Complex repairs |
| E-waste impact | Lowest | Moderate |
How DIY Repair Helps Reduce E-Waste
Every repaired device means:
- One less item in a landfill
- Fewer raw materials mined
- Lower carbon footprint
Learn how to dispose electronic waste safely and help in conserving nature. Small actions, multiplied by millions of users, make a real environmental difference.
This guide is based on common household repair scenarios, widely accepted electronics safety practices, and practical DIY repair experience.
FAQs
1. Can beginners really repair electronics at home?
Yes. Many repairs involve cleaning, replacing cables, or batteries, which are beginner-friendly.
2. Is it cheaper to repair or replace electronics?
For minor issues, repair is almost always cheaper. Replacement makes sense only for major internal damage.
3. Do DIY repairs damage devices?
Not if done carefully. Following instructions and safety rules reduces risk significantly.
4. What electronics are easiest to repair?
Remote controls, chargers, earphones, laptops (cleaning), and basic smartphone issues.
5. Can DIY repair void warranty?
Yes. Opening a device usually voids warranty. Check warranty terms first.
6. Are YouTube repair videos reliable?
Some are excellent, some are misleading. Stick to reputable creators and cross-check steps.
Conclusion
Learning how to repair common electronics at home is a practical life skill. You do not need advanced knowledge or expensive tools to fix everyday problems.
Start small. Clean devices regularly. Replace simple parts. Know your limits.
By repairing instead of replacing, you save money, reduce waste, and gain confidence in handling technology. Over time, these small efforts add up — for your wallet and for the planet.